Alright, Let’s start by saying you have Docker and Docker-Compose or you know how to install it on your system. If you dont, please, check my Docker Basics post, and once you installed Docker and Compose, and both are running on your system, come back here.
With Docker now running on our system, we will go the folder where our Ollama installation will run from.
Mine is /home/nicolas/docker/ollama .
You can choose any directory that you want, If you are just starting with Docker and this is a home-lab / testing environment, I strongly recommend that you place all your docker folder under a same parent directory, i will make installing and troubleshooting things easier.
First we will pull Ollama’s docker image from the Docker Hub Repository like so:
nicolas@ubuntuserver:~/docker/ollama$ docker pull ollama/ollama
Side Note:
Remember, ” nicolas@ubuntuserver:~/docker/ollama$ ” is particular for my machine, you may have someguy@bathroom-pc:~/Documents/ollama or something similar. ” ~/ ” in this case stands for the /home/user route and it’s abbreviated like this ~
From now onward I will just show you commands starting with the dollar sign $
The ollama pull command will download the ollama image to our local hard drive, so Docker can pull it from our disk.
Next we will set a docker compose file, for this we will edit a text file and save it as a .yml file in our ollama folder:
$ sudo nano docker-compose.yml
This will open a editor, in here we will paste the following configuration:
---
version: '3'
services:
  ollama:
    image: ollama/ollama
    container_name: ollama
    runtime: nvidia
    deploy:
      resources:
        reservations:
          devices:
            - driver: nvidia
              count: all
              capabilities:
                - gpu
    volumes:
     - /home/nicolas/docker/ollama:/root/.ollama
    ports:
     - 11434:11434
volumes:
  ollama:
    name: ollama
You need to replace /home/nicolas/docker/ollama with your ollama directory path
We can save the document by pressing CTRL+O and Enter to save and then CTRL+X to exit the nano text editor.
Now we can test our container by simply typing ” docker compose up “.
This will run ollama and install the necessary packages.
Side note: Use ” docker compose up -d ” to allow docker compose to run on detached mode aka in the background, and not on your terminal session. We will test this in a moment.
After a moment, your ollama should be now running on the background, we can confirm this by visiting out local IP and the port we have specified for ollama to run on to.
Open a browser and visit http://localhost:11434
You should see the ollama is running message:
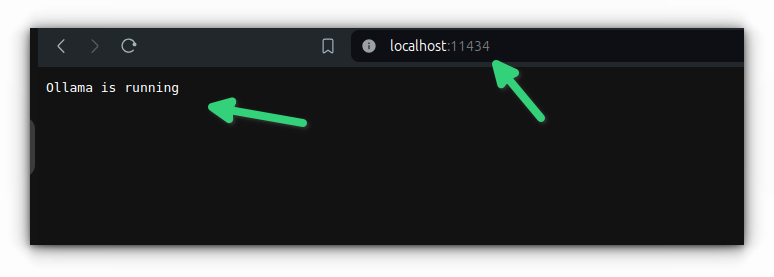
Back in our terminal we will press CTRL+C to stop the docker container.
We can now run ollama in detached mode like so:
$ docker compose up -d
You made it this far, but what is all the hype about? How is this better than Chat-GPT?
Well, this is free. and it can look awesome. See, Ollama is the engine that runs your Large Languages Models on your machine, but the Interfaces that different developers have build to use that engine with are just as amazing -if not better- than Open AI interface.
Take for example the basic Ollama skin from ollama-webui ( / open-webui ) this is an awesome yet simple user friendly interface.
To install it we can create an additional folder in our ollama directory like this:
$ sudo mkdir ollama-webui && cd ollama-webui
And then we can create another docker compose for our WebUI interface
~/docker/ollama/ollama-webui$ sudo nano docker-compose.yml
in this docker-compose.yml file we will write:
services:
  ollama-webui:
    build:
      context: .
      args:
        OLLAMA_BASE_URL: '/ollama'
      dockerfile: Dockerfile
    image: ghcr.io/open-webui/open-webui:${WEBUI_DOCKER_TAG-main}
    container_name: open-webui
    volumes:
      - /home/nicolas/docker/ollama/ollama-webui:/app/backend/data
    ports:
      - ${OPEN_WEBUI_PORT-3000}:8080
    environment:
      - 'OLLAMA_BASE_URL=http://localhost:11434'
      - 'WEBUI_SECRET_KEY='
    extra_hosts:
      - host.docker.internal:host-gateway
    restart: unless-stopped

volumes:
  ollama-webui: {}
Remember to replace the volume directory with your directory file just as you did before.
We can save the document by pressing CTRL+O and Enter to save and then CTRL+X to exit the nano text editor.
Sweet! now let’s run it on detached mode using:
$ docker compose up -d
Let’s go back to the browser and paste http://localhost:3000
You should see the Open-WebUI welcome screen:
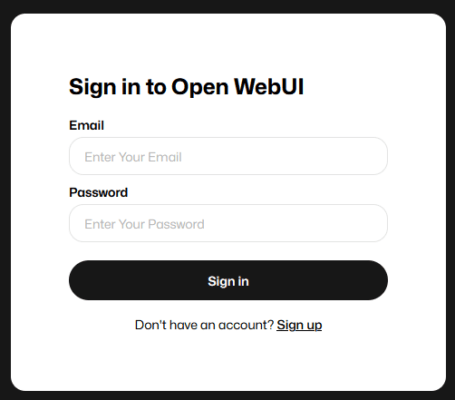
You can Sign up with your name, email and password. This wont send a 2 factor authentication or a confirmation email, it’s just for accessing your account and managing privileges.
Your email and Password can be anything, just be sure to remember it, this will be the Admin user that will allow you to do changes in the [email protected] works fine for example. you can put your [email protected] for example. Just make sure you remember this, otherwise you will have to delete the container and rebuild it again, even that is an easy tasks, so not to worry.
You have made it to the end of the tutorial. but this is just the begging. So far you have Docker, Ollama and Ollama Web User Interface running on your machine and accessible through your browser.
Now you need a Large Language Model to start chatting with.
In the lower left corner were your name is click it and go to Settings:
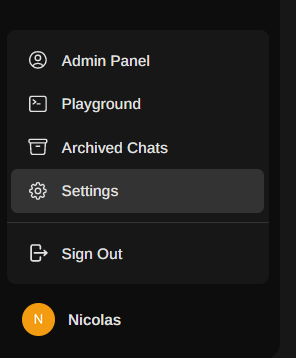
Go to Models: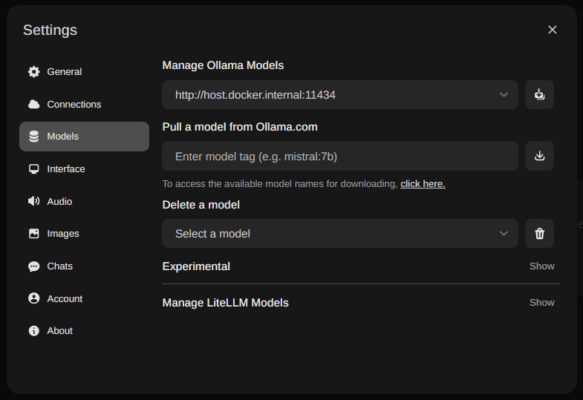
And pull a model from Ollama.com by typing the model name and the version in the middle field and pressing the download arrow
I do recommend ” llama3:latest ” for a good updated all-around LLM
Let it download and do his thing, once completed the Web-UI will let you know, have a coffee break and a lot of fun!

